Wednesday, August 21, 2013

How to Build a Hedge.

This project is simple and fast and you get some pretty nice results.  First get a green scouring pad some white glue and jumbo craft sticks.  You will want to cut the scouring pad into 6 pieces, they are about waist high to a 15mm soldier.
Cover the bottom of the cut piece of scouring pad with white glue and stick it to the craft stick.  I painted my sticks first, but I'm not sure this is necessary.  Let these dry over night.
Next cover all of the scouring pad and craft stick in white glue.  I think that using watered down white glue would be better than the pure stuff like I used, but haven't tried that yet.  
Once it is all covered in glue I cover it completely in some blended turf flock.  
Once it dries over night you can glue a couple stones to it to make it look a little more lifelike.

Sunday, August 18, 2013

How to build a 15mm stone wall

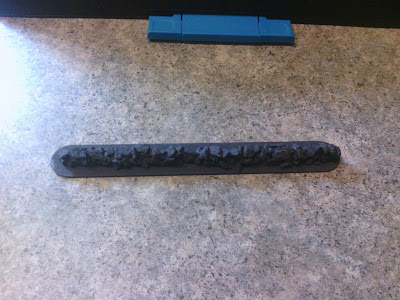
First things first is get your supplies together.  I use the Poultry Grit as the stones because it was cheap and available.  It also has nice angular pebbles which make nice looking finished wall.
I just lay down a thick layer of white Elmer's glue, which I believe is the same as PVA glue, but really have no idea.  After I lay down the glue I start by laying in a nice layer of pebbles. I let the glue dry some between layers of pebbles as it just makes it easier to work with.
After the first layer is dry I lay down another layer of white glue and keep gluing the pebbles to the wall.  This took most of the day, but only because I would let each layer dry before I started gluing the next layer.  
Once the wall is done it is time to do some painting and dry brushing.  I bought some super cheap craft paints for this at Walmart.  They cost $.57 per 2 oz. bottle.  I got pavement grey (dark grey), pewter grey (medium grey) and a bottle of white to mix with the pewter grey for the lightest layer.  Also get a cheap flat paintbrush for the painting and dry brushing.
First put a nice cover of the dark grey all over the stones and base.  
The last step is the dry brushing.  The quick and dirty explanation of dry brushing is to put a little bit of paint on the brush and wipe it off on a paper towel by "painting" the paper towel until you don't leave any paint marks.  Once this is done dry brush the stones with it.  It takes several layers of dry brushing  to get them to look like right, but the final effect is really nice.  I dry brushed first with the pewter grey then I dry brushed with a 50/50 mix of pewter grey and white.  This process goes quickly because there is so little paint that it dries very fast.  Also make sure that your first coat of dark grey is dry before you dry brush or you will have a big mess.

Friday, August 16, 2013

Good Wargaming Terrain Book

This is my favorite, albeit only, wargaming terrain book that I own.  I scoured the internet forums for a few weeks and found this to be highly recommend.  Although you have to be sure you find the one with this cover that was published in 1996.  It is very game neutral and teaches all sorts of things that I had no idea how to do.  Also gives lots of terrain ideas that can be used for any genre.  If you really have no idea what your doing like myself, I can't recommend this book enough.

Thursday, August 15, 2013

First Terrain and Some unfinished Germans


This is my first go at some terrain and painting 15mm WW2 miniatures.  I'm getting ready to field a couple army's to play the new Chain of Command game from Two Fat Lardies.  They turned out well, sorry the picture isn't as nice as it could be, but it was taken with my tablet.  I'll have to have my wife take some pictures with her fancy camera.